There is nothing more unsightly in his bathroom than a damaged and blackened joint. When you witness this situation, it is time to replace your silicone seal. For this step, there is nothing simpler, it is a matter of a few minutes.
Replacing its sanitary seals is a guarantee of cleanliness and prevents the risk of infiltration. The seal allows the toilets to fulfill their sealing function to prevent water infiltration. It is also essential to prevent the formation of mold.
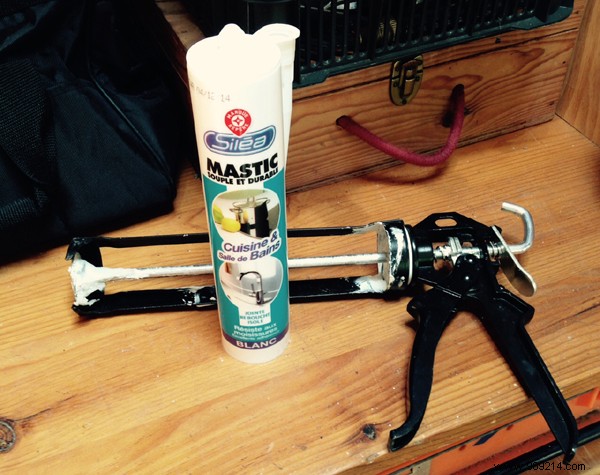
All sanitary facilities are affected by the replacement of seals, namely bathtub, shower, washbasin, toilets as well as the sink. To replace a silicone seal, a quick trip to a DIY store is essential. Of course, you need silicone, presented in a cartridge. Take care to choose the special sanitary product. Then you need a gun to spread the silicone, a seal remover but also a flathead screwdriver, a cutter, adhesive, a soft wire brush, white spirit and a sponge. Once these materials are gathered, we can get to the heart of the matter.
Thus, start by clearing the workspace, which will allow ease of movement. Once it's done, apply the joint remover which will get rid of residues in a jiffy. Eventually, you can use a flathead screwdriver to get a perfect result. Clean the support with a sponge. If necessary, use a wire brush to clean off any residue. Finish by wiping with white spirit.

Before moving on to the next step, make sure that the support is dry, this will allow the product to adhere well afterwards. When the surface is clean, take an adhesive tape and spread it on either side of the place where the new joint will be applied. This will achieve a neat and perfect result.
Then take the silicone cartridge, cut the cuticle at an angle and arm it on a gun. It is best to cut short at the beginning to check that the flow of silicone coming out is sufficient. If necessary, we can always cut a little more. You can also choose silicone with an integrated gun, also sold in DIY stores.
Spread the silicone along the support using the gun. This step is crucial and you should not have a hesitant hand when spreading the product. You have to breathe well before applying it in order to stay focused. For the silicone to adhere well to the support, the trick of the pros is to smooth everything with your finger soaked in soapy water. Then peel off the adhesive and pass a scraper for a perfect result. For small silicone residues that have overflowed onto the tiles, simply remove them with a cutter or a cloth. The product dries in about 20 minutes, but it is necessary to wait 24 hours before investing the premises.