We filled our sleigh with gift boxes. Be sure to use Mylar wrapping paper because it will hold up better in wet weather.
This project uses pocket hole joinery in a few steps. If you're not familiar with it, take a look at the basics.
All pieces are cut from 3/4 inch plywood. Click on the Materials and Tools tab to see the exact list of requirements.
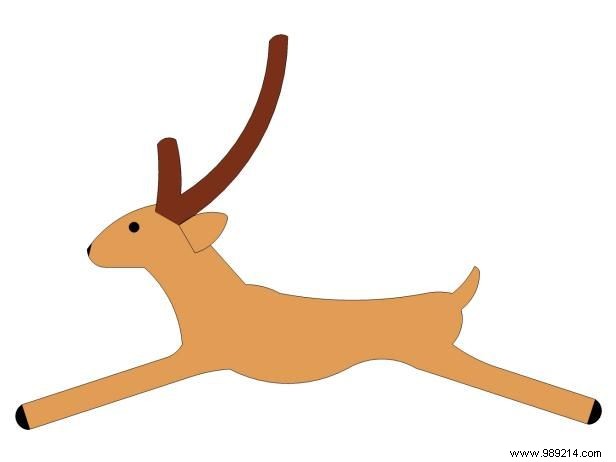
Reindeer (fold the pieces for the set)
For the body:two at 3/4" x 12-1/2" x 32"
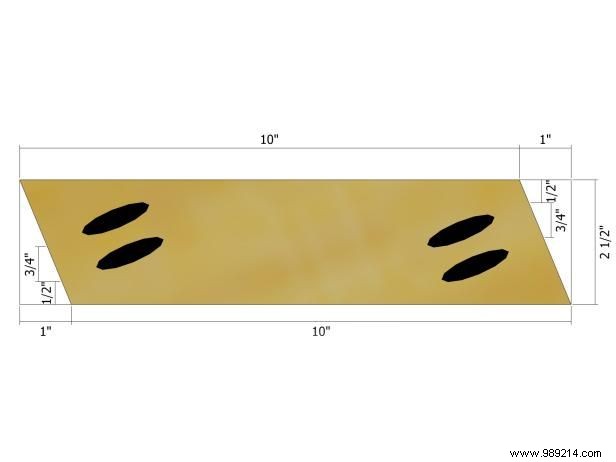
For the antlers - four at 3/4" x 5" x 12"
For the ears:four at 3/4" x 2-1/2" x 2-1/2"
For stretchers:two at 3/4" x 1-1/2" x 16"
Sled
For studs:four at 3/4" x 2-1/2" x 11"
For the rails:two at 3/4" x 2-1/2" x 11-½"
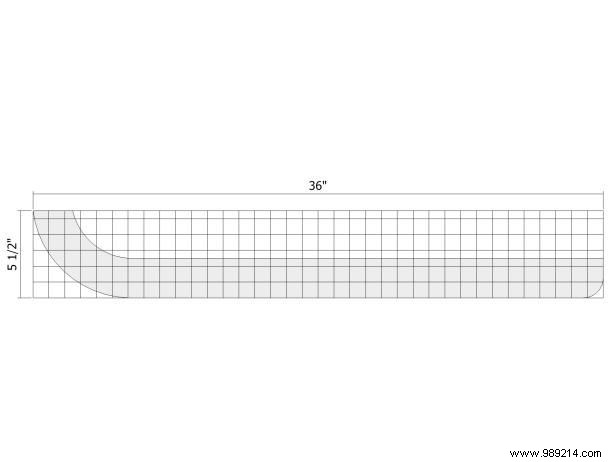
For runners:two at 3/4" x 5-1/2" x 36"
For stretchers:two at 3/4" x 1-1/2" x 16"
For the sides:two at 3/4" x 10-3/4" x 26-5/8"
For the back:one at 3/4" x 10-3/4" x 17-1/2"
For the front - one at 3/4" x 3-1/4" x 17-1/2"
For the bottom:one at 3/4" x 17-1/2" x 25-1/8"
For the divider:one at 3/4" x 5" x 17-1/2"
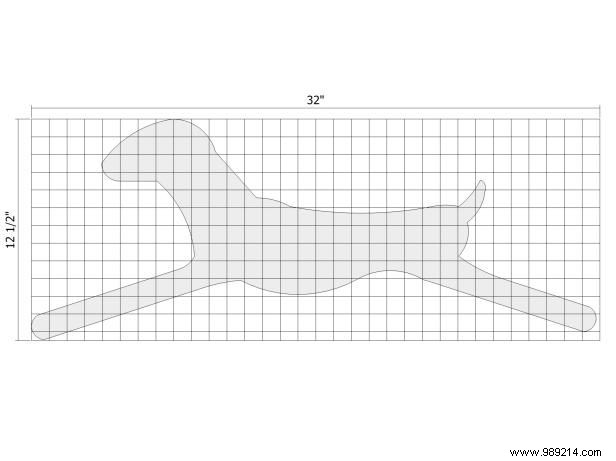
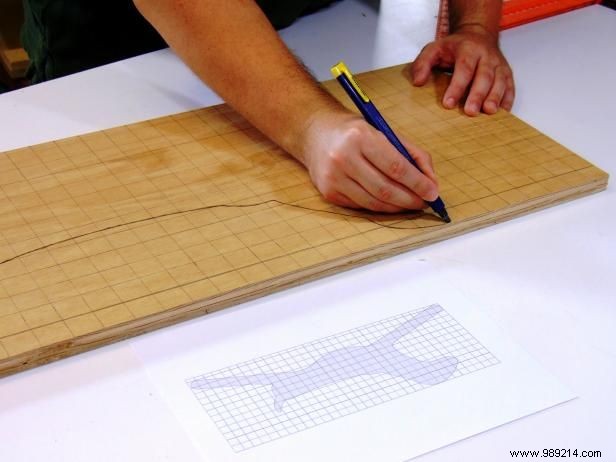
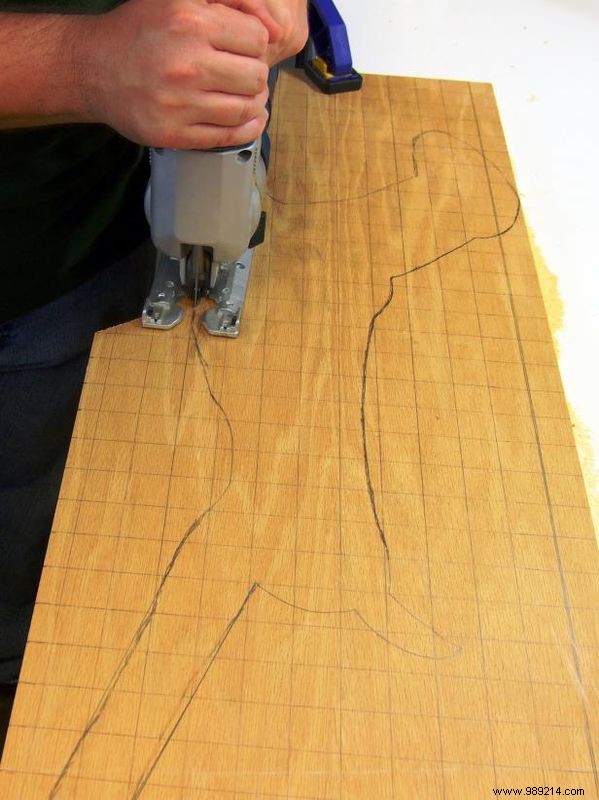
Use the guide to mark the body of the reindeer (images 1 and 2). You will create two. Cut out the body with a jigsaw (image 3). Apply light brown paint to the body and let dry.

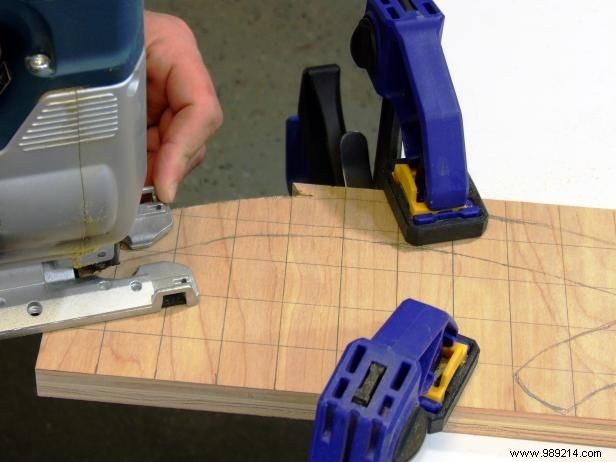
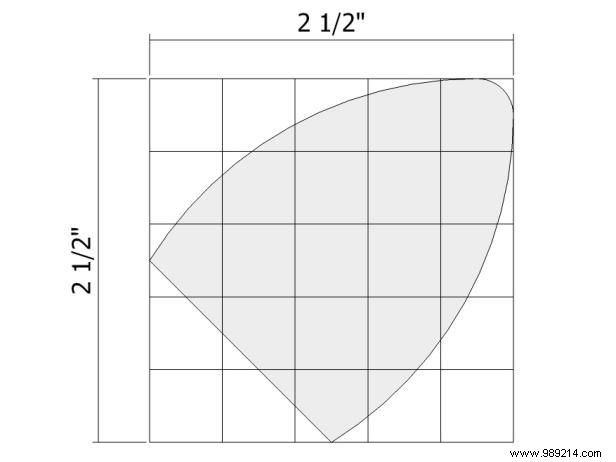
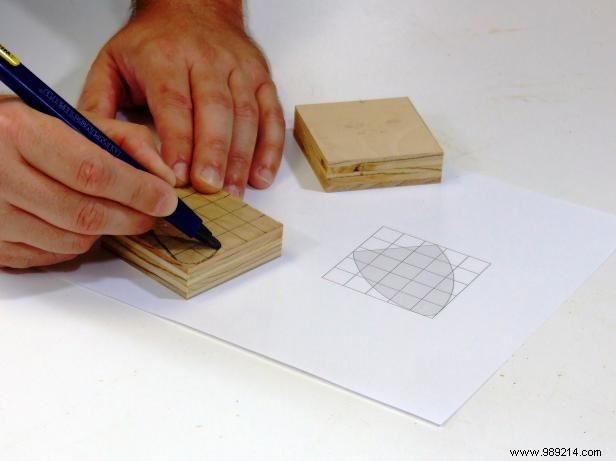
Use the guide to mark the antlers (images 1 and 2). You will create four. Cut the antlers with a jigsaw (image 3).
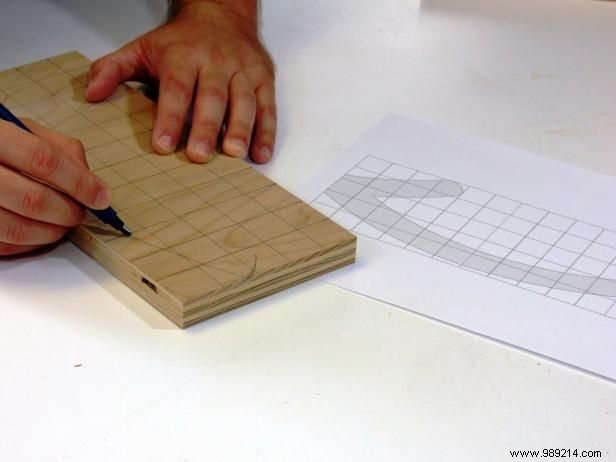
Use the guide to mark the ears (images 4 and 5). You will create four. Cut out the ears with a band saw.
Apply light brown paint to the ears and dark brown paint to the antlers (image 6).
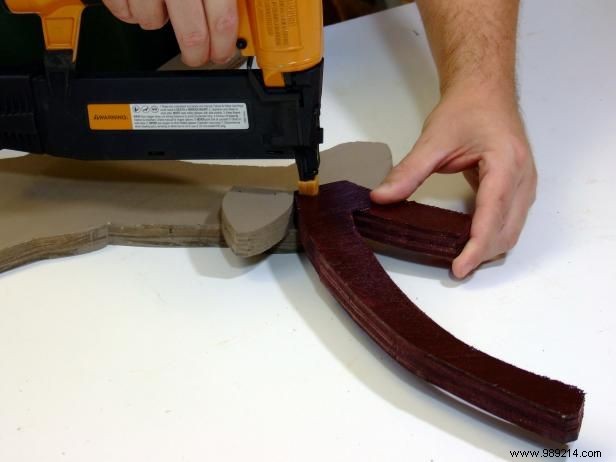
Use the guide to place the ears and antlers and paint details (image 1). Attach the antlers and ears to the body with glue and galvanized nails (image 2). Attach the studs to the reindeer to create an assembly made of two reindeer.
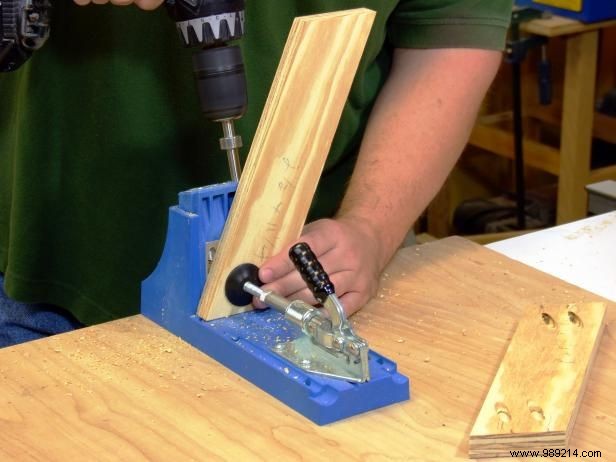

Use the guide to cut the studs to shape (image 1). Drill pocket holes (image 2).
Use the guide to cut the rails to shape and as a guide to drill pocket holes (image 3).
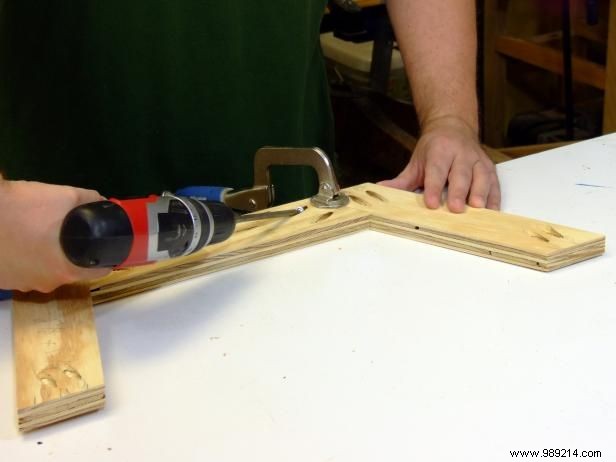
Use the guide to position the rails and attach with glue and 1-1/4-inch pocket hole screws (image 1).
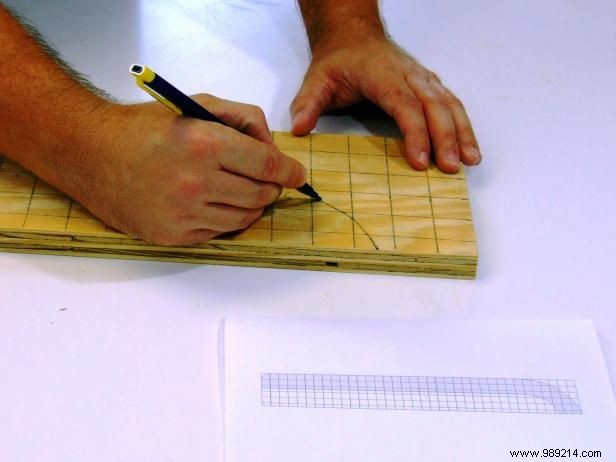
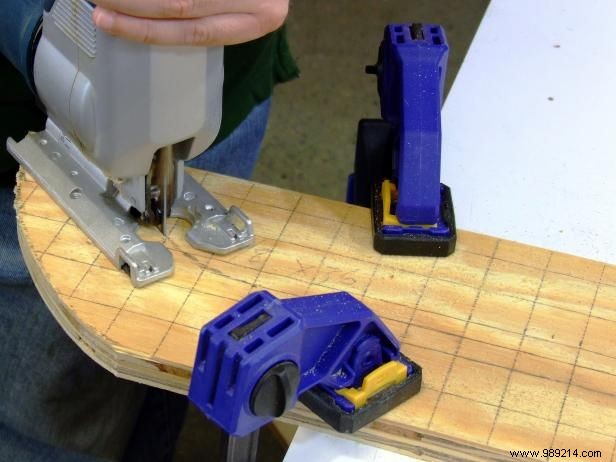
Use the guide to mark the corridors (images 2 and 3). Use a saw to cut the runners (image 4). Apply black paint to the runners and let dry.
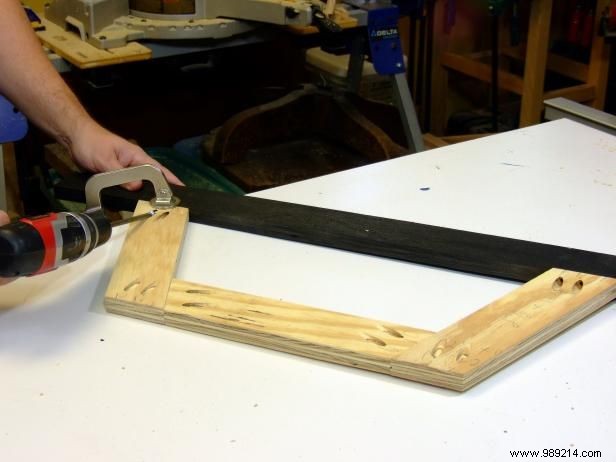
Position the rail/stile assembly five inches from the back end of the guides and secure with glue and 1-1/4-inch pocket hole screws (image 5).
Position the stretchers flush with the inside edge of the studs and attach with glue and 1-1/4-inch screws (image 6).
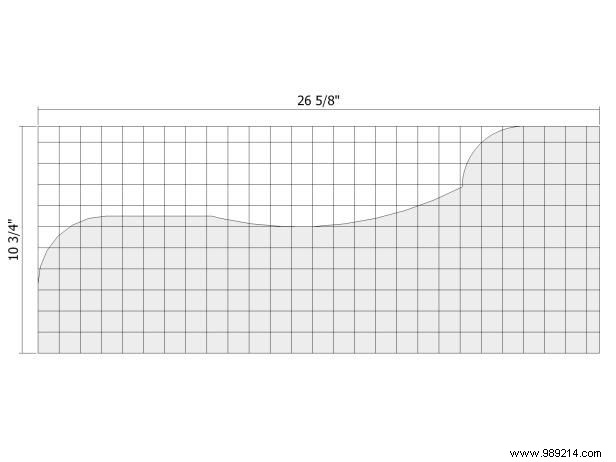
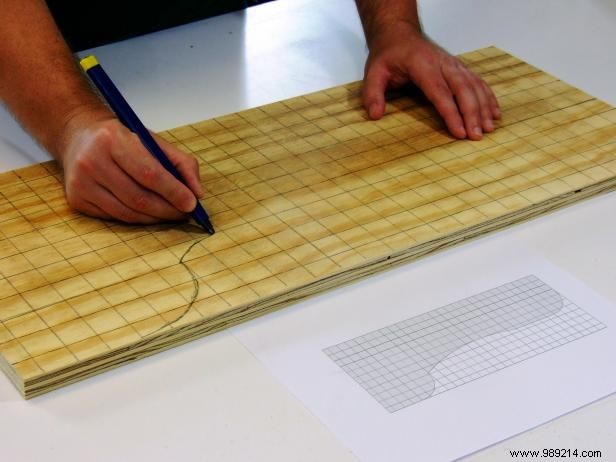
Use the guide to mark the sides (images 1 and 2). Use a saw to cut the sides. Apply red paint to the sides, back, and front.
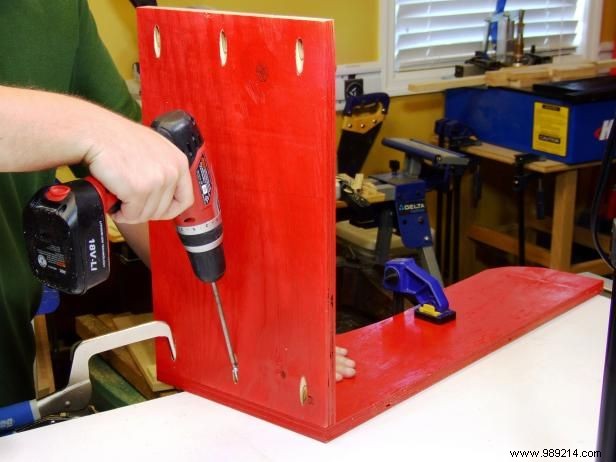
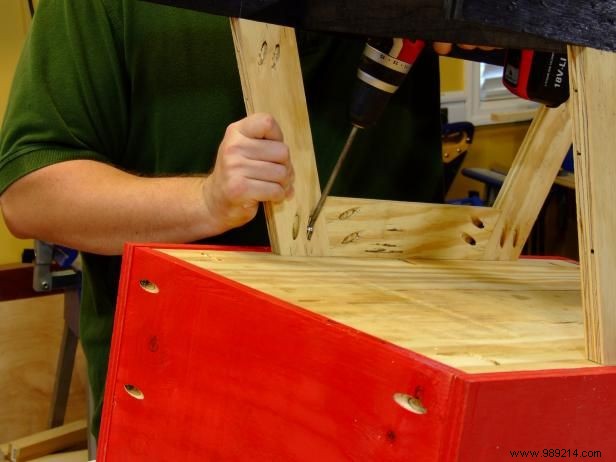
Drill three pocket holes at the ends of the back and front. Position the back flush with the back inside edge of one of the sides and attach with glue and 1-1/4-inch pocket hole screws (image 3).
Position the front flush with the inside inside edge of the side and attach with glue and 1-1/4-inch screws. Position the other side flush with the back and front edges and secure with glue and pocket hole screws.
Measure the inside dimension of the assembly and adjust the bottom size if necessary to match this dimension. Drill three pocket holes on each side of the bottom, equidistantly spaced.
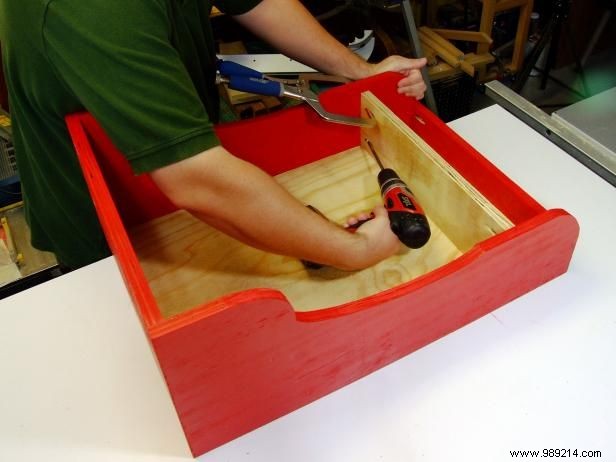
Position the bottom flush with the bottom inside edge of the assembly and attach with glue and 1-1/4" screws.
Adjust the length of the divider if necessary to match the internal dimensions of the assembly. Drill two pocket holes in the ends of the divider. Position the divider 4-1/4 inches from the front and attach to the sides with glue and 1-1/4-inch screws (image 4).
Lay the top assembly face down on your work surface. Position the base assembly five inches from the front edge of the top assembly and flush with the outside edges of the sides. Attach using glue and 1-1/4 in. screws.
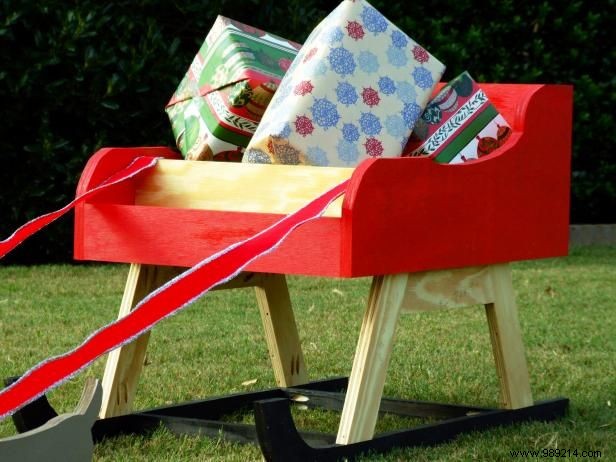
When displaying the reindeer and sleigh, place it directly in front of the sleigh and wrap the ribbons around the reindeer's necks. Staple the other end to the inside of the divider.