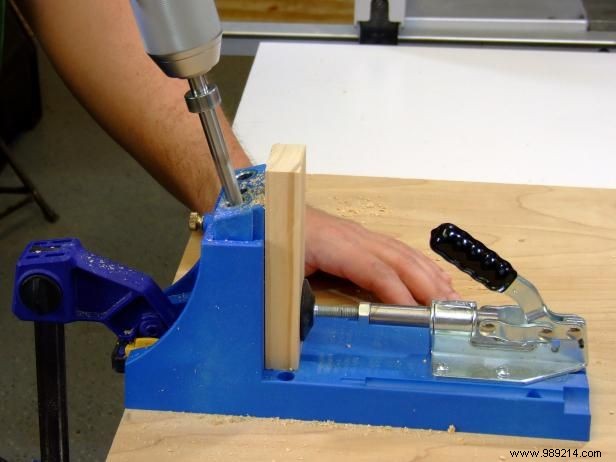
This project uses pocket woodworking. If you're not familiar with it, take a look at the basics.
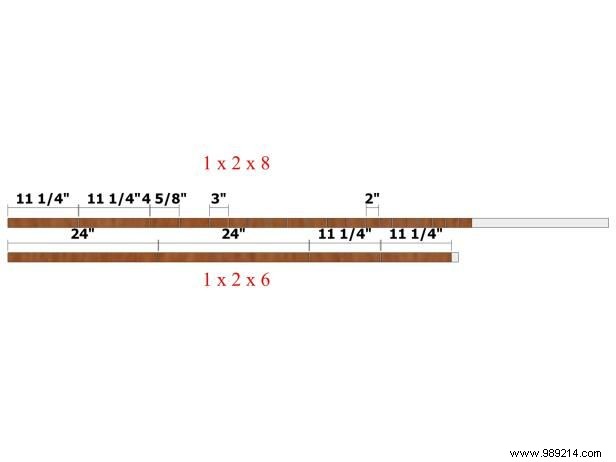
For long points:two at 3/4" x 1-1/2" x 24"
For the short points:four at 3/4" x 1-1/2" x 11-1/4"
For the long rails:eight at 3/4" x 1-1/2" x 3"
For center points:eight at 3/4" x 1-1/2" x 4-5/8"
For the short rails:eight at 3/4" x 1-1/2" x 2"
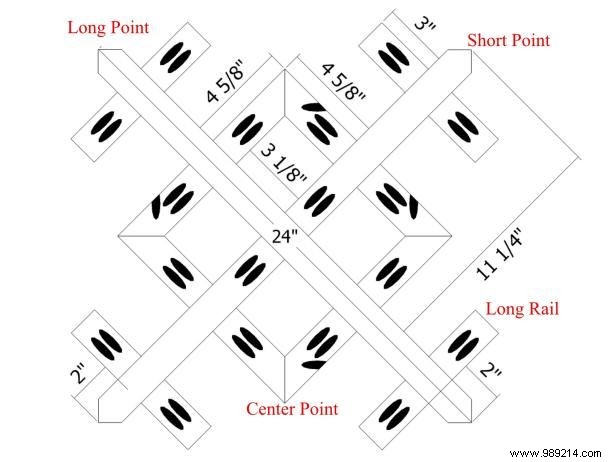
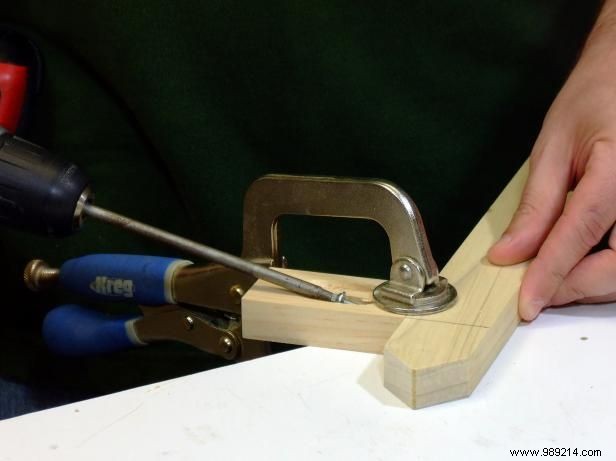
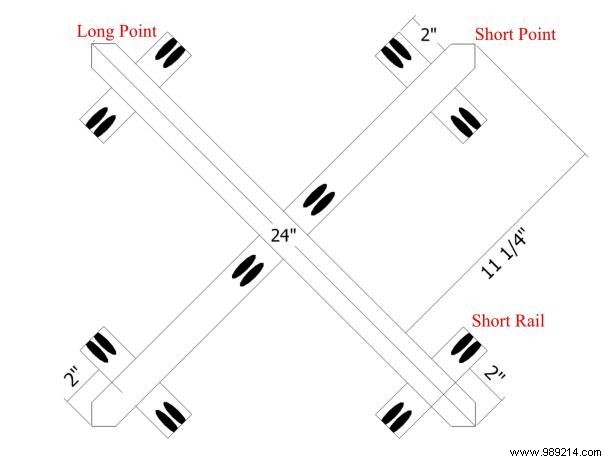
Use the guide (image 1) to cut the long points, short points, long rails and center points. See lengths in cut list. Using a miter saw, cut 45 degree angles when cutting to shape both ends of the long points and one end of the short points. Cut mitts at 45 degrees at one end of the center points.
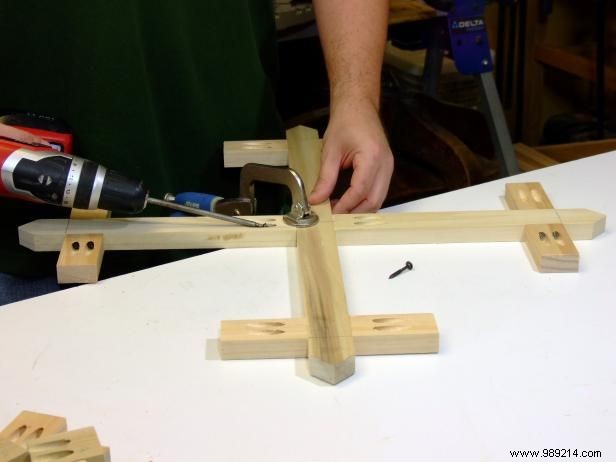
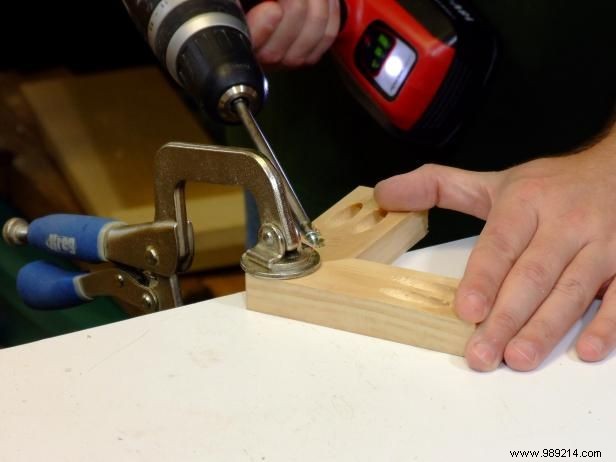
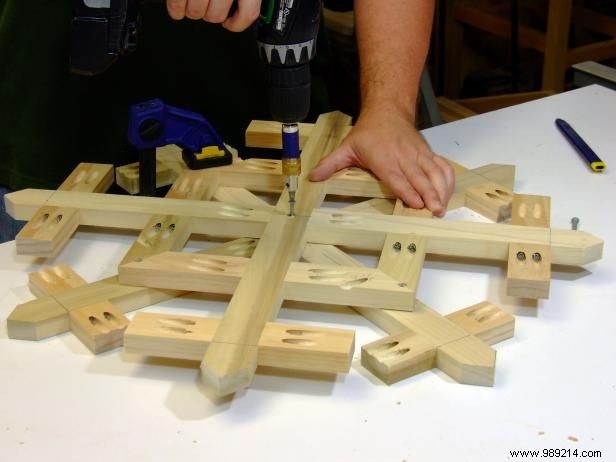
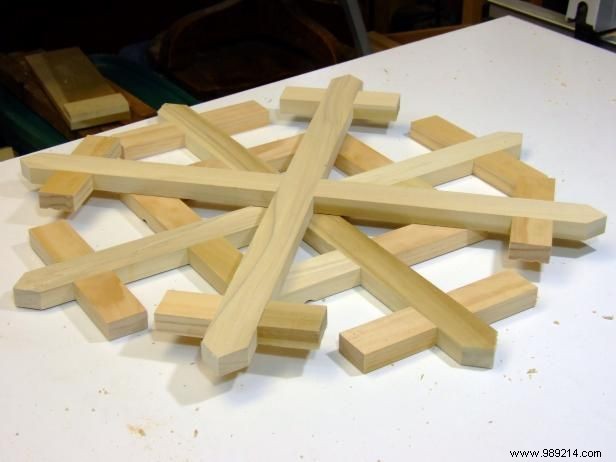
Drill holes at the short points, long rails and center points (images 1 and 2). Place the long rails two inches from the end of the long points and the short points (image 1). Attach the long rails to the long points and short points (image 3).
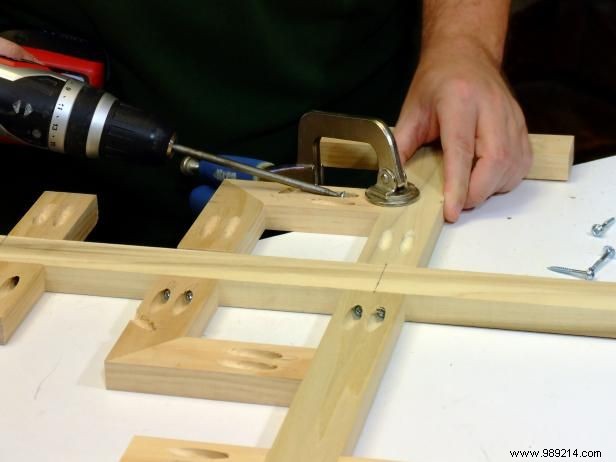
Place the short dot sets centered on the long dot sets (image 1). Attach with glue and 1-1/4 in. screws. Pocket hole (image 4).
Position center points (with mitered corners meeting) and attach with glue and 1-1/4-inch screws (image 1). Position center point assemblies and attach with glue and 1-1/4-inch pocket hole screws (image 2).
Use the guide to cut long points, short points and short rails. See the lengths of the pieces in the cut list. Using a miter saw, cut 45 degree angles when cutting to shape both ends of the long pints and one end of the short points. Drill holes at the short spots and short rails.
Position the short point sets centered on the long point sets and attach using glue and 1-1/4-inch pocket hole screws.
Lay the front frame on your work surface with the pocket holes facing up. Position the back frame, pocket holes up, rotated so that the long and short points are diagonal to the long and short points on the front frame. Attach with glue and 1-1/4-inch deck screws (image 1).
Rotate the assembly (image 2) and make the desired adjustments. Paint the assembly with white spray paint. Let the paint dry.
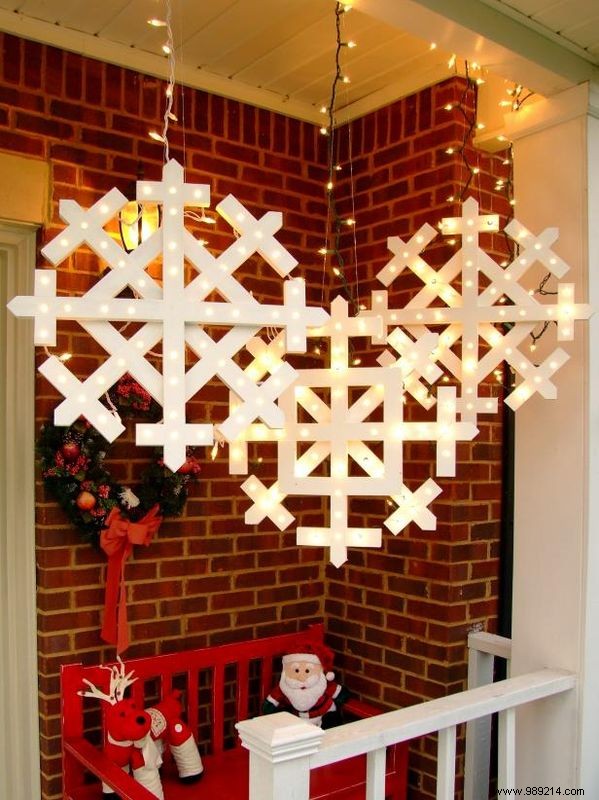
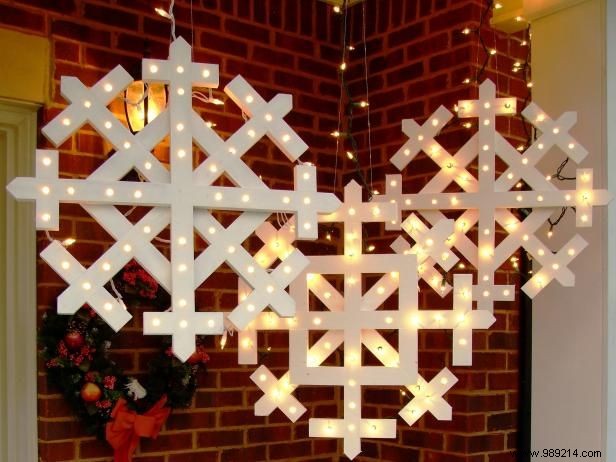
To light up the snowflake, select string lights that contain 100 bulbs. Drill holes large enough for the lights to fit through (for our lights, an 11/32-inch hole was perfect) and spaced about two inches apart along the snowflake frame. Starting with a hole near the center of the snowflake, insert the lights to the dots, then to the next set of dots and back to the center, then back off again, repeating until you've inserted the lights as desired on every flake. snow.
There are several options for displaying the snowflake, such as hanging it on a wall near an entryway, hanging it from a front porch or tree, or staking it on the ground. To hang on a wall or front porch, use a screw or nail appropriate for the type of wall or porch material and attach a picture hook or screw eye to the back of the snowflake. You can use the fishing line to suspend the snowflake from a tree or front porch (the line is relatively transparent and will be almost invisible).