Marietta fargueson
stapler
criterion
24"x32" piece of 1/4-inch-thick plywood
24"x32" batting piece
32"x40" piece of fabric
10 yds. coordinating 1/2-inch ribbon
3-1/2 yds. fat trim
13 decorative upholstery tacks (optional)
two D-rings
4' of picture hanging wire
1. Select the fabric and cut to size:four inches longer on each side than the plywood and batting.
Buyers Guide: Look for fabric scraps for this project.
2. Lay the fabric on a sturdy work table, wrong side up.
3. Cut the batting to the exact size of the plywood.
Working smarter: If you can't find the right size plywood board, have it custom made by a hardware or home store.
4. Center the batting on the fabric and then place the board over the batting.
5. Pull the fabric to the back of the board and pin it in place, finishing one side then the opposite side. Pull the fabric tight before stapling each side, leaving the corners last. You can use an electric staple gun or a manual stapler.
Security alert: Always wear safety glasses when using a staple gun.
6. Pull the batting up over the corner, and staple the corner to the back first. Then fold the remaining material and staple it too.
7. Flip the board over and mark where you want your tape to go, using a stick and a disappearing marker to draw parallel diagonal lines, about five inches apart. There are clear rulers made for this purpose, or use a sheet of colored paper with a marked line five inches from the straight edge. Set the straight edge to your first line, and then use the paper to make a dot where your next line should go.
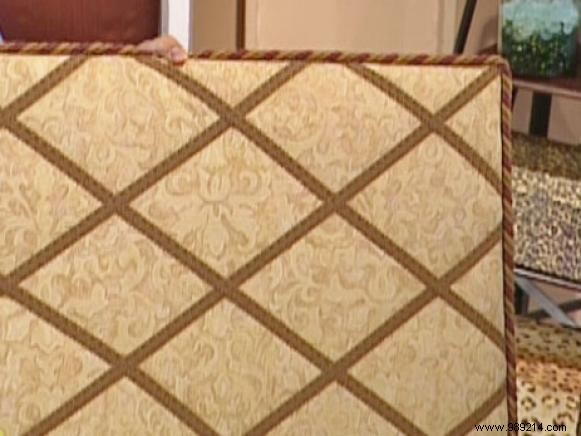
8. Draw lines on one side first, then the other to create a criss-cross pattern.
9. Cut ribbons that are a few inches longer than each of the lines.
10. Cover a set of parallel lines with tape by placing a piece of tape over each line, then pulling the excess back and stapling in place.
11. Cover the other set of parallel lines with ribbons in the same way, first weaving them over and under the already attached ribbons, in a criss-cross pattern.
12. Attach the rope braid around the outside of the board with hot glue.
13. Attach two D-rings and a picture wire to the back as if preparing to hang a framed photo.
Q:Is there a way to alter the project so that a child can make a message board?
A:Use a piece of foam core instead of the plywood, and a hot glue gun instead of the staple gun.
Q:If you make a mistake when weaving the ribbon, can you fix it without ripping it off and starting over?
A:Yes, use upholstery tacks and stick them where the tapes intersect. This will stiffen or cover any errors in the fabric.
Working smarter: Buy more upholstery tacks than you might need, in case you break one while hammering.
Q:Can I replace the tape with clear tape?
A:If you want to try this look, get some clear vinyl from the hardware store and cut it into strips.