Lucie rowe
Plexiglas is a great jewelry medium:it's colorless, versatile, and easy to work with, which means you can make it work with just about anything. You can cut it, drill it, even heat it and bend it to fit your needs.
1. Cut a piece of 1/8" plexiglass a little over 6" long. Adjust the length according to the size of your wrist. The width of the bracelet depends on your preference..
2. To make cutting easier, weigh down your plexiglass with a piece of wood as you run it through the table saw. Use a sheet of low plywood with many teeth.
3. Round off the edges of the piece using a circular saw with a spiral blade and sand the edges on all sides, either by hand or with a bench sander.
4. Remove the paper backing from both sides of the part.
5. Add color by painting with plastic paints and/or using rubber stamps and ink. Paint on the back of the piece, layering your paints; The first thing you paint will look like it's "in front" when viewed from the right side of the bracelet. Make sure the paint is dry and the piece is clean before putting it in the oven.
6. Place the cuffs on a parchment-lined baking sheet and heat in a preheated oven at 255-300 degrees.
7. Take the plexiglass out of the oven when it is soft and pliable, usually 7-10 minutes. Wearing gloves, lift the softened plexiglass up and form a bracelet. A piece of PVC pipe works great as a form for the bracelet.
8. Once the shape of the bracelet is formed, remove it from the PVC and bend the ends slightly while the piece is still hot.
9. Plastic paint may bubble slightly due to heat, giving the bracelet the appearance of blown glass. For a change, if you leave the plexiglass strips in the oven for too long, it actually bubbles and looks more like blown glass.
1. Cut 1/4" plexiglass into small squares. Do this by cutting long strips on the table saw, then use a miter box or hacksaw to cut the squares.
2. Drill two holes lengthwise (not front to back) through each square piece of Plexiglas. You will be threading elastic through these holes; Use the smallest bit that your elastic will go through. We recommend using a drill with a template to keep the holes at the same point on each cord. Note: To prevent the plastic from sticking to the drill bit, spray the drill bit with a little non-stick cooking spray before drilling.
3. After drilling the holes, remove the backing from both sides of the plexiglass.
4. Stamp or paint the beads before joining them. Remember to work on the back of the plexiglass and lay down layers of paint. The first designs you paint will be in the foreground when viewed from the front.
5. To finish the edges of each piece, apply some sheet metal to the edges and let dry.
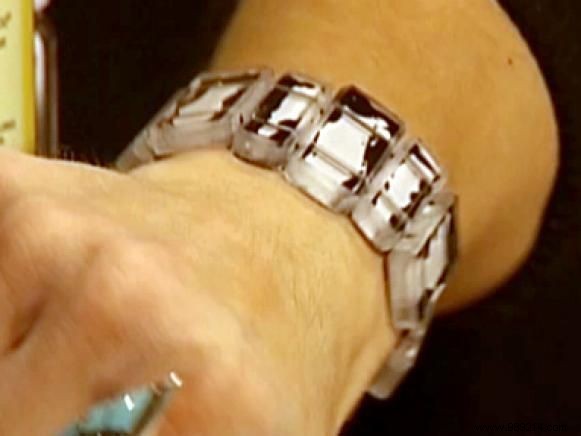
6. Select the elastic that coordinates with the beads. Place the plexiglass beads together on the elastic, or separate them with other beads.
7. When the bracelet is long enough to fit on your wrist, pull the elastic slightly and tie the ends into a knot. Trim excess elasticity..
Plexiglass beads aren't just for bangles - they can be used in earrings and pendants, or as embellishments for many other projects.